Homemade food safe wood wax
Wooden bowls, utensils and cutting boards should be oiled and waxed frequently to preserve their beauty and extend their usable life.
So you have some woodenware, whether its a beautiful wooden salad bowl, a fun end grain cutting board, or even simply some wooden spoons and spatulas, all of these items are going to need some care in order to keep them looking and feeling their best. One of the best things you can do for your woodenware, besides keeping them clean and dry, is to keep them properly oiled and waxed. Whether you’re a woodworker looking for something to condition your creations with, or you’re just a lover of wooden kitchenware, wood wax polish is a must.
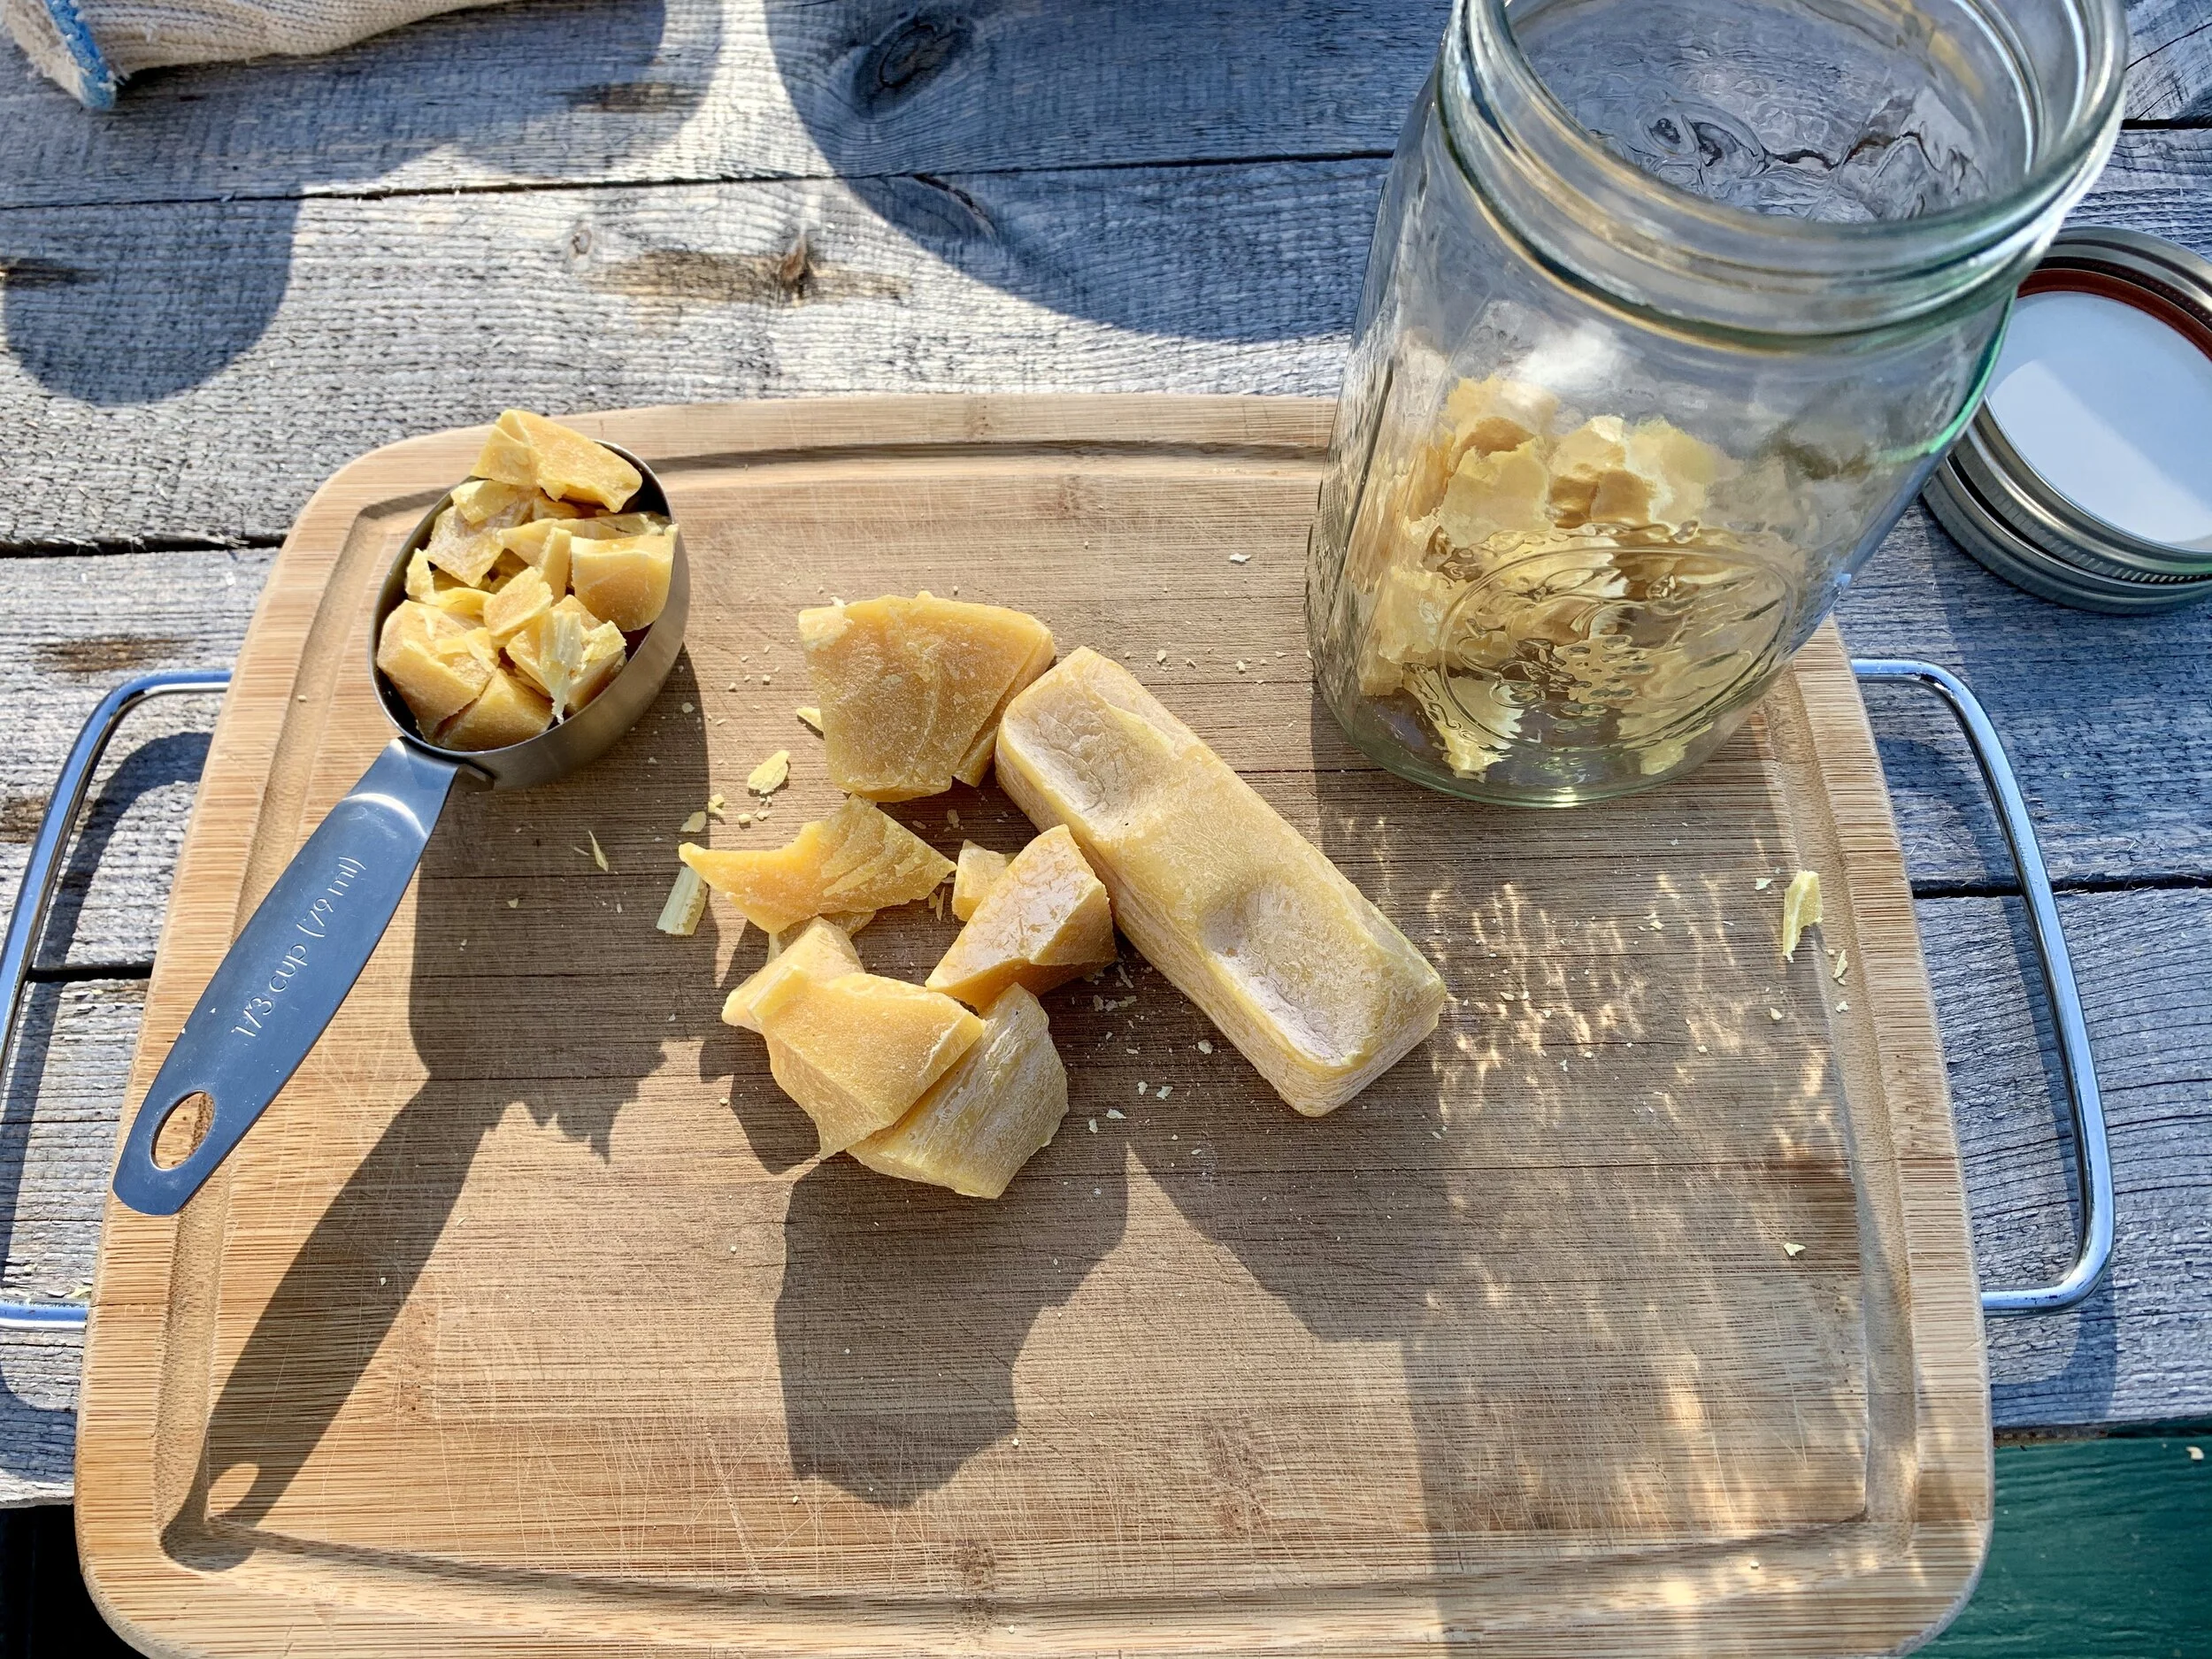
You will have to measure the beeswax after it is melted unless you chop the solid beeswax very small to get an accurate measurement.
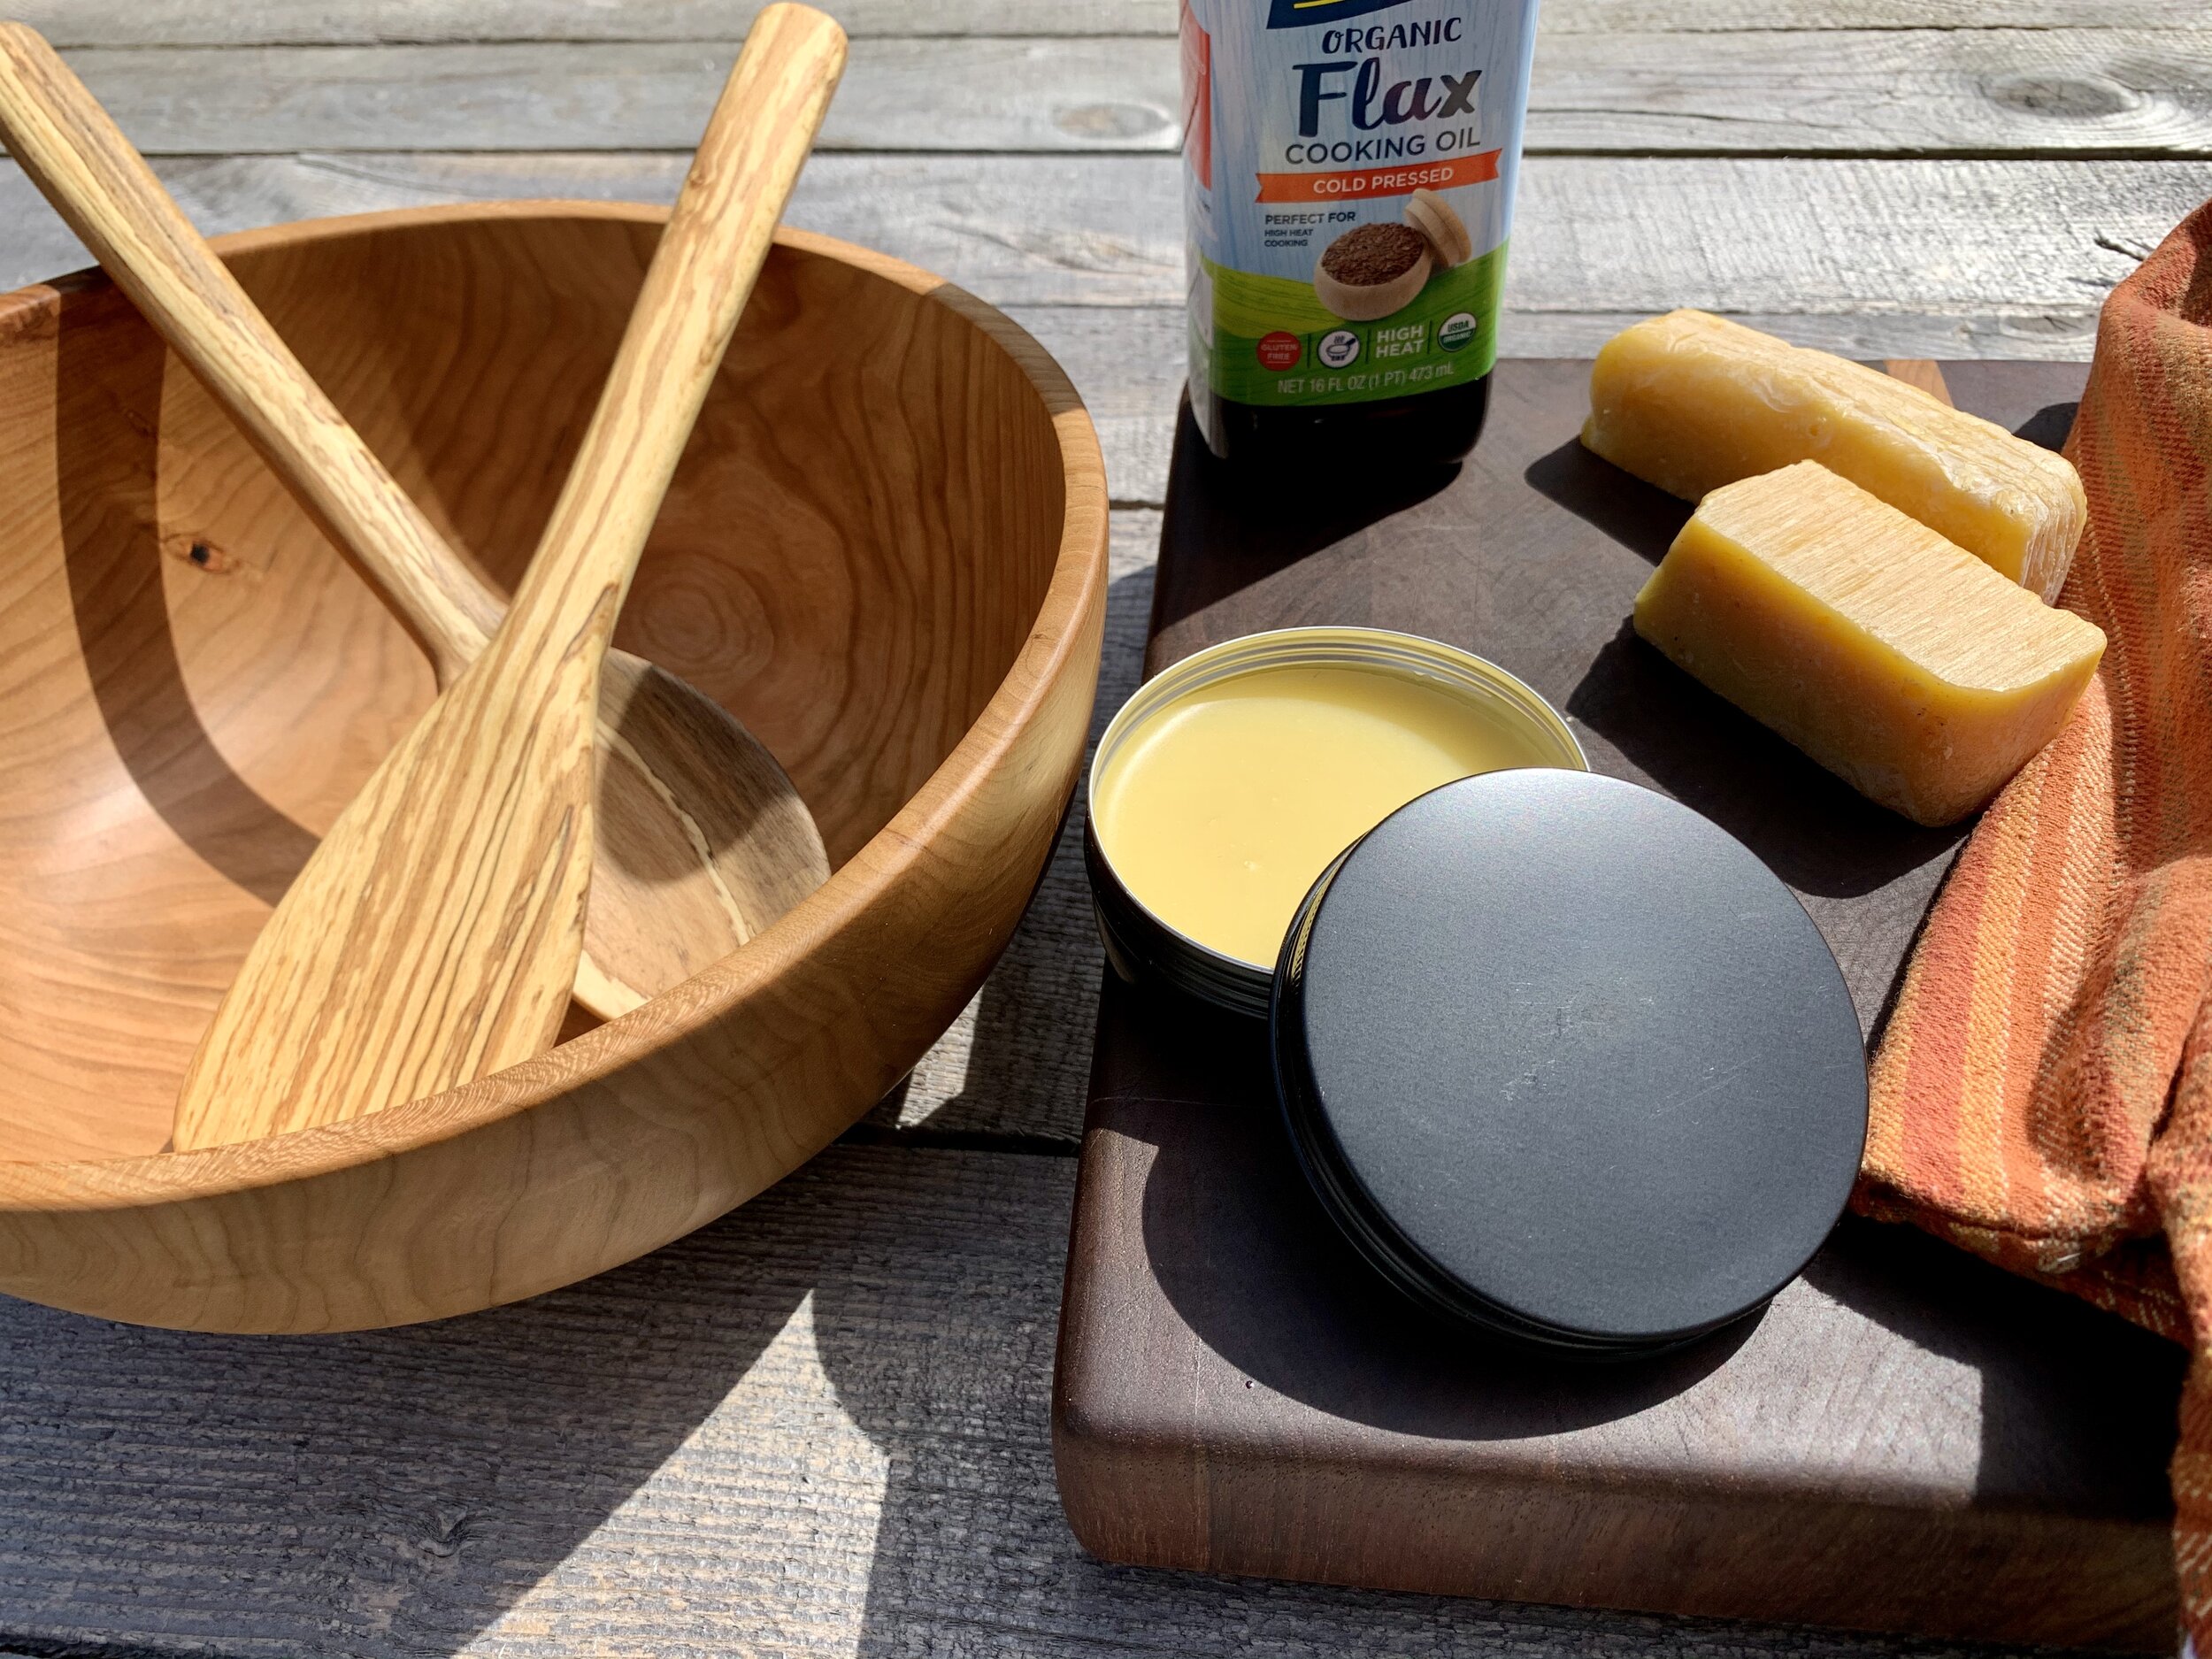
Wood wax polish, often called “wood butter”, consists of two ingredients, oil and wax, and is super easy to make. I use a homemade wood wax on all of my wooden kitchenware that consists of food grade flaxseed oil and beeswax. Other great oils are walnut oil and coconut oil, but the flaxseed oil and walnut oil are known as drying oils, and tend to be a bit more resilient.
Beeswax can be bought from co-ops or farmers markets from local bee keepers in most areas. This is a great way to help support local business and to know where your beeswax is coming from. If you can’t find it locally there are some links below where you can order some.
The basic recipe that seems to work for me is 1/3 cup wax with 1-1/2 cups of oil. This ratio gives you a semi solid paste that melts easily between your fingers, or with a little friction between a cloth and your wooden item. You should fee free to experiment a little with the ratio if you want a different consistency, a little more wax will give you a little harder paste, while a little more oil will give you a softer paste. You may need to change the ratio a bit depending on your climate, if you’re in a hot climate you may need a little more wax to keep your paste from getting too soft.
I like to use mason jars for my waxes, but any container with a removable lid that can withstand heat will work. So first off, clean your container, this paste will be in contact with the food you’re eating so you want to limit possible impurities.
Beeswax usually comes in brick form and can be pretty hard, so you’ll want to carefully cut chunks off of the brick with a sharp serrated knife. A serrated edge knife works best because you can saw chunks off.
Another option that works well is to break chunks off of the brick with a hammer or mallet. A way to do this without pieces flying all over the place is to place a towel over the brick of wax before you smack it.

Melting the beeswax in a mason jar using a pan of water on the stove.
Place the pieces in one of your mason jars and set by your stove. Grab a sauce pan big enough to hold the mason jar and fill it 1/3 to 1/2 with water, making sure that it doesn’t go over the rim of the mason jar when the jar is placed in it. You will want to put the mason jar in the sauce pan of water and place on the stove over a medium heat. Do not heat the mason jar directly over the burner on the stove because it can cause the jar to crack or break. The water helps to distribute the heat evenly over the jar and keeps jar from getting too hot. Continue to heat the beeswax stirring occasionally with a wooden dowel or wooden spoon (don’t use metal to stir the wax to avoid accidentally chipping the glass) until the chunks are completely melted.
While the beeswax is heating up take the time to measure out your desired amount of oil and set it aside so you can grab it quick when the time comes.
When the wax in completely melted, turn the burner off and using a towel or an oven mitt take the mason jar out of the pot of hot water (being careful not to burn yourself on the hot jar or pan) and measure out your desired amount of melted wax into the second jar. Some mason jars have measurement lines on them that can be used or use a measuring cup, but you may have to heat the measuring cup in order to clean the solidified wax out of it when you’re done. If you didn’t melt enough wax you can simply put it back on the stove and add a few more chunks. If you melted too much beeswax, it’s not wasted, just set the hot jar on a towel on the counter and let it cool, then put the lid on it and set it aside for the next time you need it.

Measure out the desired amount of melted beeswax and oil and combine using a wooden dowel or spoon.
After you measure out your beeswax, add it to the second jar and carefully place that jar in the pan of warm water and add your measured oil to the jar and stir with your wooden dowel or spoon to combine the two. If the water wasn’t warm enough and the wax starts to solidify as soon as the oil hits it you may need to turn the burner back on to remelt the beeswax, as long as there is water in the pan that should keep the oil/wax mixture from getting too hot.
After the oil and wax a completely combined carefully take the jar out of the pan the same way you did earlier and set on a towel on the counter and let it completely cool. While the mixture is still warm and in a liquid state you can pour it into small tins to make using the wax easier. These little tins are also nice if you want to sell the wax or give it away to customers as a bonus when they make a purchase.
If your looking for supplies for this project you can use the links below.
After the mixture is cooled you should have a yellow creamy looking paste that melts easily when you rub your fingers on it. And your done, its that easy to create a wood wax that’ll keep your wooden kitchenware looking and feeling their best!

Beautiful homemade natural beeswax/flaxseed oil wood wax.
Supplies needed:
1/3 cup Beeswax
1-1/2 cup Flaxseed oil
2- Quart size Mason Jars
Wooden Dowel or Spoon
Measuring cups
Small saucepan